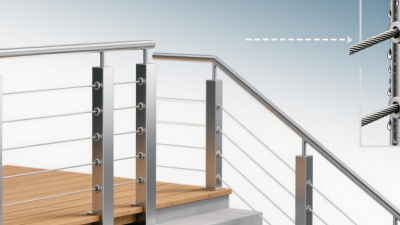
10 Tips for Buying Cable Railing Parts
A clean cable railing can make a deck feel open, but the finished look depends on parts that work together. Posts, fittings, cables, and tensioners must suit the layout, material, and intended use. A low price can be tempting. It may not tell you whether the fittings match your posts or whether the cable will stay properly tensioned.
For this guide, hypothetical cable-railing specialist Alex Morgan offers a practical rule: “Buy for the layout, not just the price.” This is an illustrative editorial quote, not a verified statement from a real expert. The advice still points to a useful habit: measure each run, check corner and end-post conditions, and confirm hardware compatibility before ordering. A sketch with post spacing and cable direction can prevent a box of unusable fittings from arriving at your door.
The ten tips ahead focus on choosing cable railing parts with care. They cover material and finish, cable diameter, fitting types, system compatibility, and supplier details. They also encourage checking the manufacturer’s installation guidance rather than relying on assumptions. Small details matter. A turn, stair angle, or exposed coastal location may change which components make sense. Some decisions are less obvious than they look, and a checklist cannot replace careful measurement. Use these points to compare options, ask better questions, and spot gaps before installation begins. The goal is a system that looks considered and performs reliably—not simply the cheapest cart.
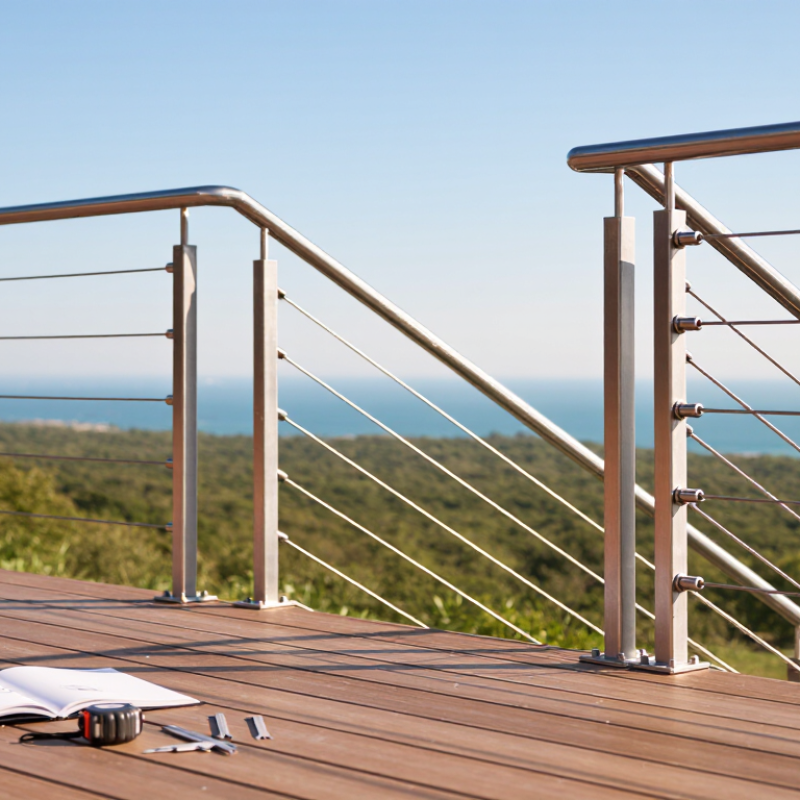
Define the Railing Layout, Span, and Intended Use
Before choosing cable railing parts, draw the railing route from above and mark every corner, opening, stair transition, and end point. Note where posts can attach to framing or another solid structure, not just where they look balanced. A quick sketch is useful, but it can hide awkward angles. Walk the area with a tape measure.
Record each straight span between supports, plus the total run and every change in direction. Long spans may need intermediate posts or a different support plan, depending on the railing system and its installation instructions. Don’t estimate from a floor plan alone; walls, trim, and site conditions can change the usable dimensions. Measure twice. Small details matter.
Then define the intended use: a deck edge, balcony, interior landing, or stairway can each have different layout needs. Consider foot traffic, weather exposure, nearby children or pets, and how the railing will be cleaned and inspected. Check applicable local building requirements before selecting spacing and hardware. Be honest about what you have not verified; one missed stair angle can affect cable lengths, fittings, and installation time. A second site check may feel fussy, but it can prevent parts from arriving that do not fit.
Select Compatible Posts, Cables, and Fittings
Cable railing works as a system, not a collection of interchangeable parts. Start by checking post spacing, post strength, and the cable diameter the design requires. End and corner posts handle more tension than intermediate posts, so confirm they are suitable for the planned layout. A post that flexes can leave cables looking slack, even when the fittings are tightened correctly. Small details matter.
Choose fittings made for the exact cable diameter and post material. A fitting that looks close may not grip securely or sit flush. Check whether each run needs a tensioning fitting, a fixed fitting, or a directional fitting at a turn. Measure carefully, including the extra cable needed for connections and adjustments. I would recheck corner measurements; they are easy to underestimate.
Match materials for the site conditions. Coastal air, frequent rain, and poolside moisture can affect how metals hold up, so verify material compatibility with the supplier’s specifications. Before ordering, assemble a small sample using one post, one cable, and the intended fittings. It can reveal awkward clearances or mismatched threads early. Check applicable building requirements, too. A little extra planning beats reordering parts.
Compare Materials, Finishes, and Corrosion Resistance
When buying cable railing parts, compare the metal as carefully as the price. Stainless steel is commonly used for cables and fittings because it handles moisture well, but its corrosion resistance varies by grade. For coastal decks or areas exposed to de-icing salts, a more corrosion-resistant stainless grade may be worth the added cost. Ask for the material specification rather than relying on a polished appearance.
Finishes affect both protection and upkeep. Brushed stainless steel hides small scratches better than a mirror finish, while powder-coated aluminum posts offer color choices and a smooth surface. Check for chips around drilled holes and cut edges; exposed metal can become a weak point. Not always obvious. Pair compatible metals where possible, since contact between unlike metals in wet conditions can encourage corrosion. A small washer choice can matter more than expected.
Look at every part, not just the cable: terminals, turnbuckles, screws, and end fittings face the same weather. In a damp climate, inspect them periodically for tea-colored staining, loose connections, or coating damage. Rinse salt deposits away with fresh water and use cleaning methods suited to the selected finish. I have seen buyers focus on the posts and overlook tiny fittings. That’s an easy mistake. Before ordering, confirm that the parts are intended for your environment and railing layout.
Check Building Codes and Installation Requirements
Before buying cable railing parts, check the rules that apply to your specific deck, balcony, or stairway. Requirements can differ by location and building type. Ask your local building department about guardrail height, cable spacing, stair details, and required loads. Don’t rely on a neighbor’s setup; their structure may follow different rules. Small details matter.
Tip: Measure twice, then confirm the measurements against approved plans.
Check how each part fits the full installation. Posts, corner fittings, end terminals, and cable must work together. Some systems need stronger posts or extra support to manage cable tension. A sturdy-looking post is not proof that it meets the requirements. I’ve seen shoppers focus on cable length and overlook the end connections. Easy mistake.
Before purchasing, review installation instructions and confirm that your tools, post spacing, and mounting surfaces match the specified conditions. For stairs, measure along the slope and check how the cable layout meets local spacing rules. Keep the code notes and product specifications together. If a requirement is unclear, pause and ask a qualified installer or building official. It may delay the order, but it can prevent costly rework.
10 Tips for Buying Cable Railing Parts - Check Building Codes and Installation Requirements
| # | Buying Tip | What to Check | Why It Matters |
|---|---|---|---|
| 1 | Confirm local building codes first | Ask your local building department which guard height, opening-size, load, and permit rules apply to your project. | Requirements can vary by jurisdiction, building use, location, and the code edition adopted locally. |
| 2 | Check the required guard height | Verify the required height for your deck, balcony, landing, or stair guard, and where that height is measured. | There is no single height that applies to every building and installation. |
| 3 | Plan for opening and deflection limits | Ask how the completed railing must comply with applicable opening-size rules, including any rules for cable deflection under load. | Cable can flex when pushed, so post spacing and cable tension can affect whether the installed system meets local requirements. |
| 4 | Measure the full railing layout | Record straight-run lengths, corners, stair angles, end points, and changes in level before ordering cable and fittings. | Accurate measurements help determine cable lengths, fitting quantities, and the number and location of posts. |
| 5 | Match parts to the post material | Check that terminals, fasteners, and mounting hardware are suitable for the post material and its dimensions. | Wood, metal, and other structural materials can require different attachment methods and hardware. |
| 6 | Choose a compatible cable and fitting system | Confirm cable diameter, fitting type, compatible tools, and whether the components are intended to work together. | Mixing incompatible components may prevent proper installation or reliable tensioning. |
| 7 | Account for the environment | Consider exposure to rain, salt air, chemicals, and dissimilar metals; check material compatibility and corrosion guidance. | Environmental exposure can affect corrosion resistance and the service life of cable and fittings. |
| 8 | Check corner and end-post requirements | Plan for the extra forces at cable ends and direction changes, and verify that the supporting posts and connections are designed for them. | End and corner locations carry cable tension and may need stronger or differently configured supports. |
| 9 | Review stair-specific components | Confirm that fittings, cable routing, and post placement suit the stair angle and comply with applicable stair-guard rules. | Stair runs have different geometry from level runs and may be subject to additional opening and handrail requirements. |
| 10 | Read installation and inspection instructions | Check the specified drilling pattern, tensioning sequence, maintenance guidance, and any documentation needed for approval. | Following the system instructions helps achieve a consistent installation and makes it easier to verify compliance. |
Note: Building-code requirements vary by location and project. Confirm the applicable rules and approval requirements with your local building department before purchasing or installing railing parts.
Estimate Part Quantities, Costs, and Supplier Support
10 Tips for Buying Cable Railing Parts
Tip 1: Sketch each railing section and mark posts, corners, stairs, and openings. Tip 2: Measure cable runs from fitting to fitting, not just the deck edge. Tip 3: Count end fittings, tensioners, and intermediate supports for every run. Tip 4: Add a small allowance for offcuts or measurement changes. Measure twice. Even careful estimates can miss a corner.
Tip 5: Request an itemized quote, separating hardware, cable, shipping, and any recommended tools. Tip 6: Compare complete system costs, not just the price per cable spool. Tip 7: Ask whether fittings suit your post material and cable diameter. A low price can hide missing parts. Tip 8: Check lead times before ordering, especially if several components ship separately.
Tip 9: Ask the supplier to review your parts list against a simple drawing. Share post spacing, cable count, and corner details. Tip 10: Confirm what support is available if installation questions arise, and request written care or tensioning guidance. Keep the quote and product specifications together. I would still recheck quantities before placing the order; estimates are useful, but real layouts can be less tidy than sketches.
Estimated Cable Railing Parts Cost for a 20-Foot Section
Illustrative mid-range estimates in USD. Actual prices vary with material, finish, layout, and supplier.
Planning assumptions: 20 feet of railing, 10 horizontal cable runs (about 200 linear feet of cable), six posts, and 20 feet of top rail. Estimated ranges are cable and end fittings: $200–$600; posts: $300–$900; top rail: $400–$1,200; and fasteners: $40–$120. Before ordering, ask the supplier to confirm fitting and post compatibility, cable spacing, cut lengths, and applicable local code requirements.
Related Posts
-
How to Choose Cable Railing Parts in 2026?
-
How to Choose Cable Railing Hardware in 2026?
-

Essential Tips for Choosing Cable Railing Hardware?
-
Top 10 Cable Railing Parts for Global Buyers to Consider?
-
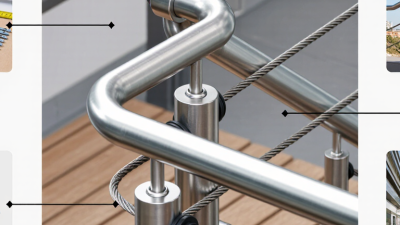
7 Tips for Choosing a Cable Handrail System
-

Exploring Cable Fence Innovations at the 138th China Import and Export Fair 2025